


การแนะนำ
If you’re planning to build a website, learning how to install วordpress on Hostinger website is one of the smartest starting points. WordPress powers a massive portion of the internet because it’s flexible, beginner-friendly, and scalable. Meanwhile, Hostinger is known for its affordability, speed, and simplified hosting dashboard.
This guide explains the entire process in a clear, educational way—from setting up hosting to launching your WordPress site. Whether you’re a beginner or someone looking to streamline your workflow, you’ll understand not just what to do, but why it matters.
Why Choose WordPress and Hostinger Together?
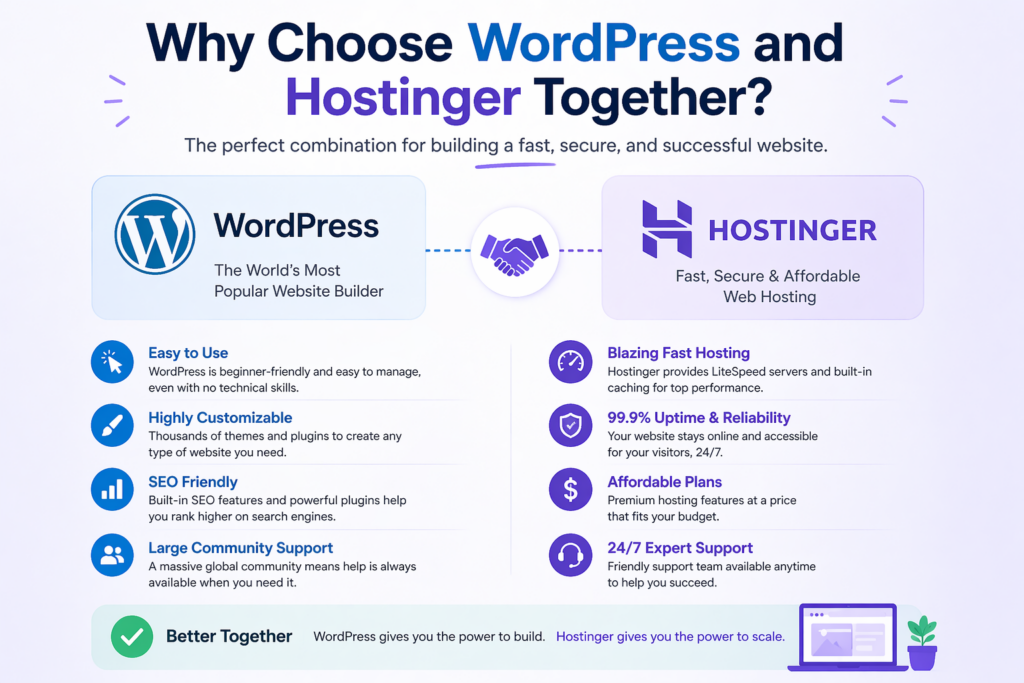
Before jumping into installation, it’s important to understand why this combination works so well.
1. WordPress: Flexible and Powerful
WordPress is an open-source content management system (CMS) that allows you to:
- Build blogs, business websites, or eCommerce stores
- Customize design with themes
- Extend functionality using plugins
- Scale as your traffic grows
2. Hostinger: Beginner-Friendly Hosting
Hostinger simplifies the technical side of hosting by offering:
- One-click WordPress installation
- Optimized servers for WordPress performance
- Easy-to-use dashboard (hPanel)
- Affordable plans for startups
Together, they create an ideal environment for launching a website quickly without needing advanced technical skills.
Step 1: Purchase Hosting and Domain
The first step in installing WordPress on Hostinger is securing your hosting plan.
Choose a Hosting Plan
Hostinger typically offers several plans. For beginners, a basic shared hosting plan is enough. However, if you expect growth, consider a higher-tier plan for better performance.
Register a Domain Name
Your domain name is your website’s address (e.g., yourbrand.com). Many Hostinger plans include a free domain for the first year.
Tips for choosing a domain:
- Keep it short and memorable
- Avoid hyphens and numbers
- Match your brand or niche
Once your purchase is complete, you’ll gain access to the Hostinger dashboard.
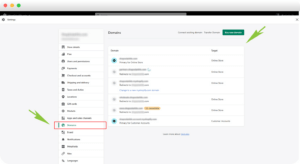
Step 2: Access Hostinger hPanel
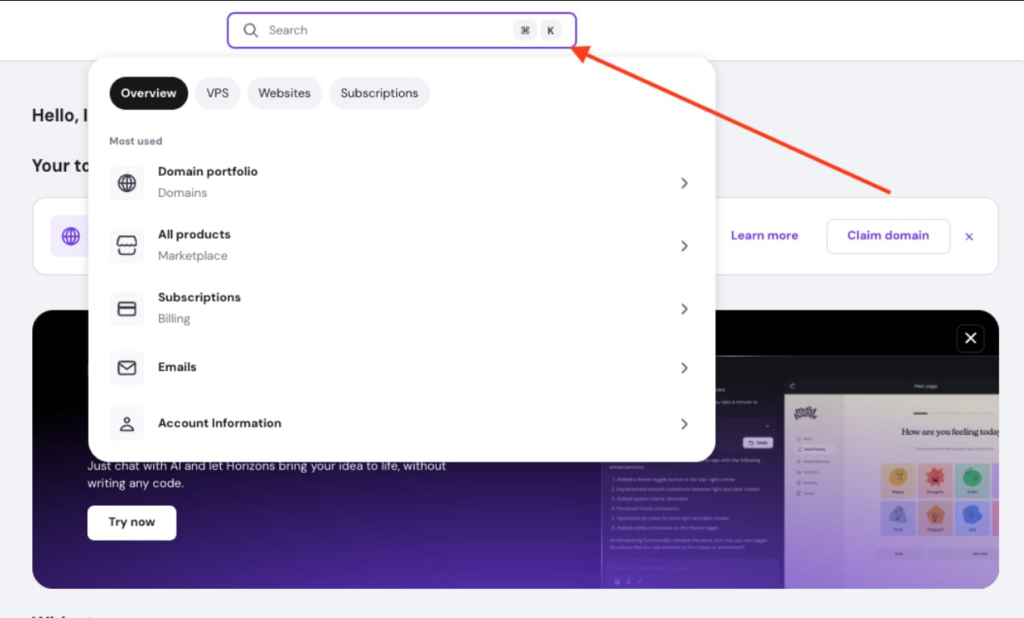
After logging into your Hostinger account, you’ll be directed to hPanel, which is their custom control panel.
This is where you’ll manage:
- Domains
- Hosting settings
- WordPress installations
- Databases and files
Compared to traditional panels like cPanel, hPanel is more intuitive and designed for beginners.
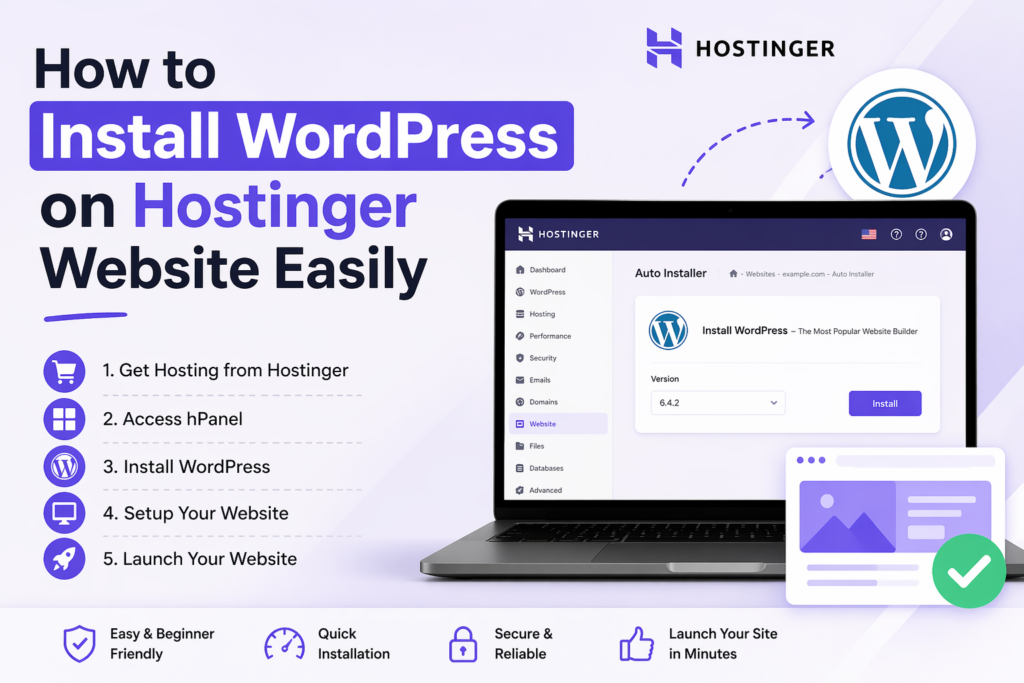
Step 3: Use One-Click WordPress Installation
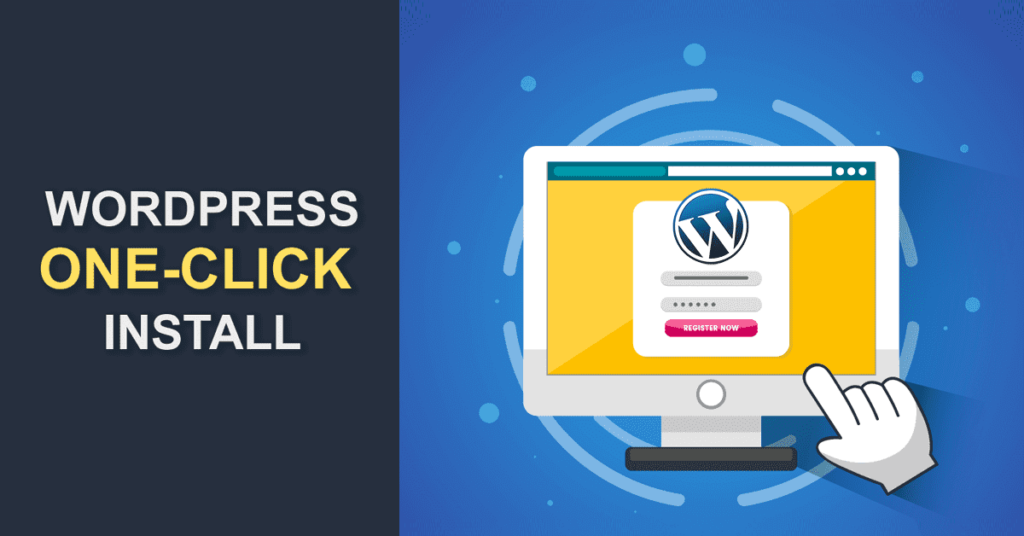
The easiest way to install WordPress on Hostinger is through their built-in auto-installer.
Navigate to Auto Installer
Inside hPanel:
- Go to Websites
- Click Manage next to your domain
- Find Auto Installer
- Select WordPress
Fill in Installation Details
You’ll be asked to enter:
- Website title (your site name)
- Administrator email
- ชื่อผู้ใช้และรหัสผ่าน
- Language
Make sure to use a strong password and a valid email address, as these will be used to access your WordPress dashboard.
Select Advanced Options (Optional)
Some setups allow you to:
- Choose a WordPress version
- Enable automatic updates
- Install recommended plugins
For most users, default settings work perfectly.
Complete Installation
Click Install, and within seconds, WordPress will be installed on your domain.
Step 4: Access Your WordPress Dashboard
Once installation is complete, you can log into your WordPress admin panel.
Login URL
Your login page is typically:
yourdomain.com/wp-admin
Enter your username and password to access the dashboard.
What You’ll See
The WordPress dashboard includes:
- Posts and pages management
- Theme customization
- การติดตั้งปลั๊กอิน
- การตั้งค่าและการกำหนดค่า
This is the control center of your website.
Step 5: Configure Basic WordPress Settings
After installing WordPress on Hostinger, it’s important to configure essential settings.
General Settings
Go to Settings → General:
- Update your site title and tagline
- Set your timezone
- Ensure your email is correct
Permalink Structure
Go to Settings → Permalinks and choose:
- Post name structure
This improves SEO and makes URLs cleaner.
Discussion Settings
You can control comments, moderation, and notifications under:
- การตั้งค่า → การสนทนา
Adjust based on whether you want user interaction on your site.
Step 6: Install a Theme
Themes control the visual appearance of your website.
How to Install a Theme
- Go to Appearance → Themes
- Click Add New
- Browse or search for a theme
- Click Install → Activate
Choosing the Right Theme
มองหา:
- การตอบสนองต่ออุปกรณ์เคลื่อนที่
- Fast loading speed
- Customization options
Popular themes include lightweight and multipurpose designs suitable for business or eCommerce.
Step 7: Install Essential Plugins
Plugins add functionality to your WordPress site.
Must-Have Plugins
After installing WordPress on Hostinger, consider adding:
- SEO plugin (for search engine optimization)
- Security plugin (to protect your site)
- Caching plugin (to improve speed)
- Backup plugin (to prevent data loss)
How to Install Plugins
- Go to Plugins → Add New
- Search for a plugin
- Click Install → Activate
Avoid installing too many plugins, as it can affect performance.
Step 8: Secure Your Website
Security is often overlooked but critical.
Basic Security Steps
- Use strong passwords
- Change default login username
- Enable SSL (HTTPS)
- Install a security plugin
Hostinger usually provides a free SSL certificate, which you can activate from hPanel.
Step 9: Optimize Performance
A fast website improves user experience and SEO.
Speed Optimization Tips
- Use a caching plugin
- Compress images
- Choose a lightweight theme
- Enable CDN (Content Delivery Network)
Hostinger’s infrastructure already helps with performance, but these steps enhance it further.
Step 10: Create Your First Pages
Now that WordPress is installed, it’s time to build your site.
Essential Pages
Most websites include:
- Home page
- About page
- Services or Products page
- Contact page
Creating a Page
- Go to Pages → Add New
- Add title and content
- Click Publish
You can also use page builders for visual editing if you prefer a drag-and-drop experience.
Step 11: Connect Domain and Check Live Site
If your domain is purchased through Hostinger, it’s already connected. If not, you may need to update DNS settings.
Test Your Website
Visit your domain in a browser and confirm:
- Pages load correctly
- Images display properly
- Links work
This ensures your WordPress installation is functioning as expected.
Common Issues and Solutions
Even though installing WordPress on Hostinger is straightforward, you might encounter some minor issues.
1. Can’t Access WordPress Admin
- Check your login URL
- Reset your password if needed
2. Website Not Loading
- Verify domain connection
- Clear browser cache
- Check hosting status
3. Slow Website Speed
- Optimize images
- Reduce plugins
- Enable caching
Manual Installation (Advanced Option)
While one-click installation is recommended, advanced users may prefer manual setup.
Steps Overview
- Download WordPress from the official site
- Upload files via File Manager or FTP
- Create a database in hPanel
- Configure wp-config.php
- Run installation script
This method gives more control but requires technical knowledge.
Why Learning This Process Matters
Understanding how to install WordPress on Hostinger website is more than just a setup task—it’s a foundational skill.
It allows you to:
- Launch projects independently
- Reduce reliance on developers
- Customize websites freely
- Scale your business online
For anyone working in web design, eCommerce, or digital marketing, this knowledge is essential.
บทสรุป
Installing วordpress on Hostinger is a straightforward process when broken down into clear steps. By choosing the right hosting plan, using the one-click installer, and configuring essential settings, you can launch a fully functional website in minutes.
From there, your focus shifts to design, content, and optimization. With the right setup, WordPress becomes a powerful platform that supports long-term growth, flexibility, and performance.
คำถามที่พบบ่อย
Installing WordPress on Hostinger usually takes less than 5 minutes using the one-click auto installer in hPanel.
No, Hostinger’s one-click installation makes it beginner-friendly. You don’t need coding or technical experience to get started.
Yes, WordPress itself is free. However, you need to pay for hosting and a domain, which Hostinger provides.
You can install WordPress using a temporary domain, but it’s recommended to connect your own domain for a professional website.
hPanel is Hostinger’s custom control panel where you can manage your hosting, install WordPress, and control website settings.
Yes, you can reinstall WordPress anytime through hPanel or reset your site using backup or reinstall options.

ออกแบบและสร้างเว็บไซต์ WordPress หรือเว็บไซต์องค์กรพร้อมระบบอีคอมเมิร์ซครบวงจรสำหรับคุณ.
ช่วงราคา: $200.00 ถึง $2,500.00custom-requirements-or-special-quotations
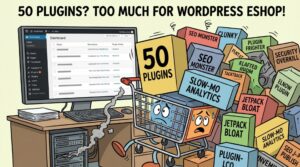
ราคาเดิมคือ: $2.00.$1.00ราคาปัจจุบันคือ: $1.00. การใช้ปลั๊กอิน 50 ตัวมากเกินไปสำหรับร้านค้าออนไลน์ที่ใช้ WordPress หรือไม่?
การเข้าใจผลกระทบที่แท้จริงต่อประสิทธิภาพ การมีปลั๊กอิน 50 ตัวบนเว็บไซต์อีคอมเมิร์ซ WordPress ไม่ใช่ปัญหาโดยอัตโนมัติ จริงๆ แล้ว จำนวนเพียงอย่างเดียวแทบจะไม่สามารถกำหนดประสิทธิภาพได้....

ภาพหลักสำหรับการออกแบบอุปกรณ์กายภาพบำบัดที่บ้านของ Amazon (อธิบายรายละเอียด)
บทนำ: การสร้างภาพลักษณ์ที่น่าเชื่อถือสำหรับอุปกรณ์บำบัดที่บ้านบน Amazon เมื่อออกแบบภาพหลักสำหรับอุปกรณ์บำบัดที่บ้านบน Amazon สิ่งสำคัญอันดับแรกของเราคือ...

ภาพหลักสำหรับการแปลงลิปสติกเป็นสินค้าสำหรับ Amazon
บทนำ: การออกแบบภาพหลักลิปสติกที่ขายได้บน Amazon เมื่อเราออกแบบภาพหลักสำหรับลิปสติกบน Amazon ความรับผิดชอบของเราไม่ได้จำกัดอยู่แค่...

แฮกเกอร์ขโมยอีเมลผู้ดูแลระบบ WordPress ได้อย่างไร (และวิธีป้องกัน)
มาเริ่มกันด้วยความจริงที่ไม่น่าสบายใจ: อีเมลแอดมิน WordPress ของคุณอาจเปิดเผยต่อสาธารณะมากกว่าที่คุณคิด และแฮกเกอร์? พวกเขาชอบมาก สำหรับพวกเขา...

อะไรทำให้รองพื้นชนิดเหลวของ Amazon (ภาพหลัก) ขายดี?
บทนำ การออกแบบภาพหลักสำหรับรองพื้นชนิดเหลวบน Amazon ไม่ใช่แค่การทำให้ผลิตภัณฑ์ดูสวยงามเท่านั้น บน Amazon ภาพหลักและ...
การออกแบบภาพหลัก Amazon ที่มีประสิทธิภาพสำหรับตลับกรอง
บทนำ การออกแบบภาพหลักสำหรับ Amazon ไม่ใช่แค่การทำให้สินค้าดูน่าดึงดูดเท่านั้น แต่ยังเกี่ยวกับความชัดเจน ความน่าเชื่อถือ และความเข้าใจได้ในทันที โดยเฉพาะอย่างยิ่งสำหรับ...
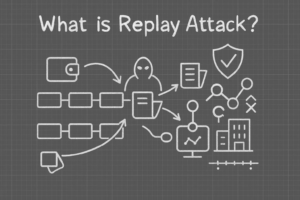
การโจมตีแบบ Replay Attack บน WordPress: ภัยคุกคามจริงหรือแค่เรื่องที่ถูกพูดเกินจริง?
ก่อนอื่นขอชี้แจงให้ชัดเจนก่อน การโจมตีแบบ Replay Attack นั้นดูไม่น่ากลัว มันไม่ได้ทำลายรหัสผ่าน มันไม่ได้แทรกโค้ดที่เป็นอันตรายพร้อมข้อความแฮ็กเกอร์สีเขียวกระจัดกระจายไปทั่ว มันแนบเนียนกว่า...

วิธีคัดลอกหน้าเว็บ WordPress โดยไม่ทำให้ระบบเสียหาย
ยอมรับกันเถอะ บางครั้งคุณอาจไม่อยากสร้างหน้าเว็บใหม่ คุณแค่อยากได้หน้าเว็บเดิม...แต่แตกต่างไปเล็กน้อย รูปแบบเหมือนเดิม บล็อกเหมือนเดิม การตั้งค่าเหมือนเดิม เพราะ...

เปรียบเทียบธีม WordPress สำหรับสัตว์เลี้ยง 5 แบบ
บทนำ การเลือกธีม WordPress ที่เหมาะสมสำหรับธุรกิจเกี่ยวกับสัตว์เลี้ยงนั้นไม่ใช่แค่เรื่องของการออกแบบเท่านั้น แต่ยังส่งผลโดยตรงต่อการใช้งาน ความสามารถในการขยายขนาด และการเติบโตของธุรกิจในระยะยาว การดูแลสัตว์เลี้ยงและ...

เปรียบเทียบธีมอีคอมเมิร์ซชุดว่ายน้ำ 5 แบบ
บทนำ การเลือกธีมที่เหมาะสมสำหรับร้านค้าอิสระที่จำหน่ายชุดว่ายน้ำหรือชุดชั้นในนั้นไม่ใช่แค่การตัดสินใจด้านภาพลักษณ์เท่านั้น แต่ยังส่งผลโดยตรงต่ออัตราการเปลี่ยนลูกค้าให้เป็นผู้ซื้อ ความสามารถในการขยายธุรกิจ และความยั่งยืนในระยะยาว...

วิธีปิดการแสดงความคิดเห็นใน WordPress (โดยไม่ต้องเสียสติ)
มาพูดถึงระบบแสดงความคิดเห็นของ WordPress กันดีกว่า ในทางทฤษฎีแล้ว ความคิดเห็นนั้นยอดเยี่ยมมาก มันช่วยกระตุ้นการสนทนา สร้างชุมชน และทำให้เว็บไซต์ของคุณดูมีชีวิตชีวา แต่ในความเป็นจริงแล้ว มันมักจะเป็นเหมือนแม่เหล็กดึงดูด...

ข้อผิดพลาด WordPress 500: เมื่อเว็บไซต์ของคุณเกิดอาการผิดปกติ
เว็บไซต์ WordPress ของคุณยังใช้งานได้ปกติดีเมื่อสักครู่ คุณรีเฟรชหน้าเว็บ แล้วจู่ๆ ก็เกิดข้อผิดพลาด 500 Internal Server Error ขึ้นมา ไม่มีคำอธิบาย ไม่มีคำขอโทษ มีเพียงข้อความที่เย็นชาและสับสนซึ่งโดยพื้นฐานแล้ว...

การสร้างเว็บไซต์ WordPress ที่ปรับขนาดได้สำหรับแบรนด์ที่ขับเคลื่อนด้วยวิทยาศาสตร์: โครงการ AminoUSA
บทนำ ในยุคดิจิทัลปัจจุบัน เว็บไซต์เป็นมากกว่าแค่สถานที่สำหรับแสดงรายการสินค้า สำหรับแบรนด์ที่ขับเคลื่อนด้วยวิทยาศาสตร์ซึ่งดำเนินงานในอุตสาหกรรมที่มีการควบคุมหรือเน้นการวิจัย...

สร้างร้านค้า Shopify ที่ปรับขนาดได้สำหรับแบรนด์ใบมีดระดับโลก: โครงการ CoolKatana
บทนำ ในธุรกิจอีคอมเมิร์ซข้ามพรมแดน เว็บไซต์ Shopify เป็นมากกว่าแค่หน้าร้าน สำหรับแบรนด์ที่ดำเนินธุรกิจในกลุ่มเฉพาะหรือกลุ่มที่ขับเคลื่อนด้วยวัฒนธรรม เว็บไซต์ต้องทำมากกว่านั้น...
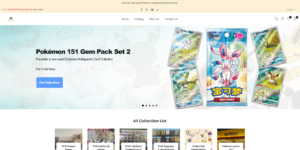
การออกแบบร้านค้า Shopify ที่มีอัตราการแปลงสูงสำหรับขายการ์ดโปเกมอน
บทนำ ในโลกของอีคอมเมิร์ซสินค้าสะสม โดยเฉพาะอย่างยิ่งในตลาดเกมการ์ดโปเกมอน (TCG) เว็บไซต์จะต้องทำมากกว่าแค่แสดงรายการสินค้า...
ดีไซน์ Shopify ที่เพิ่มยอดขายสำหรับแบรนด์อิฐสั่งทำพิเศษ
บทนำ ในสภาพแวดล้อมการแข่งขันอีคอมเมิร์ซในปัจจุบัน โดยเฉพาะอย่างยิ่งในตลาดของขวัญส่วนบุคคลและของสะสม เว็บไซต์ Shopify ต้องทำมากกว่าแค่แสดงสินค้า...

วิธีติดต่อฝ่ายสนับสนุนของ Shopify: คู่มือที่ง่ายและไม่ยุ่งยาก
การบริหารร้านค้า Shopify ควรเป็นเรื่องที่น่าตื่นเต้น ไม่ใช่เรื่องที่ทำให้สับสน เมื่อมีคำถามหรือปัญหาเกิดขึ้น Shopify มีช่องทางการสนับสนุนหลายช่องทาง ขึ้นอยู่กับสถานการณ์...
วิธีปิดใช้งานร้านค้า Shopify: คู่มือที่ชัดเจนและใช้งานได้จริง
การปิดใช้งานร้านค้า Shopify นั้นไม่ซับซ้อน แต่ก็มีผลกระทบหลายอย่างที่ผู้ขายหลายรายมองข้ามไป คู่มือนี้จะอธิบายขั้นตอนอย่างละเอียดและเข้าใจง่าย...