


การแนะนำ
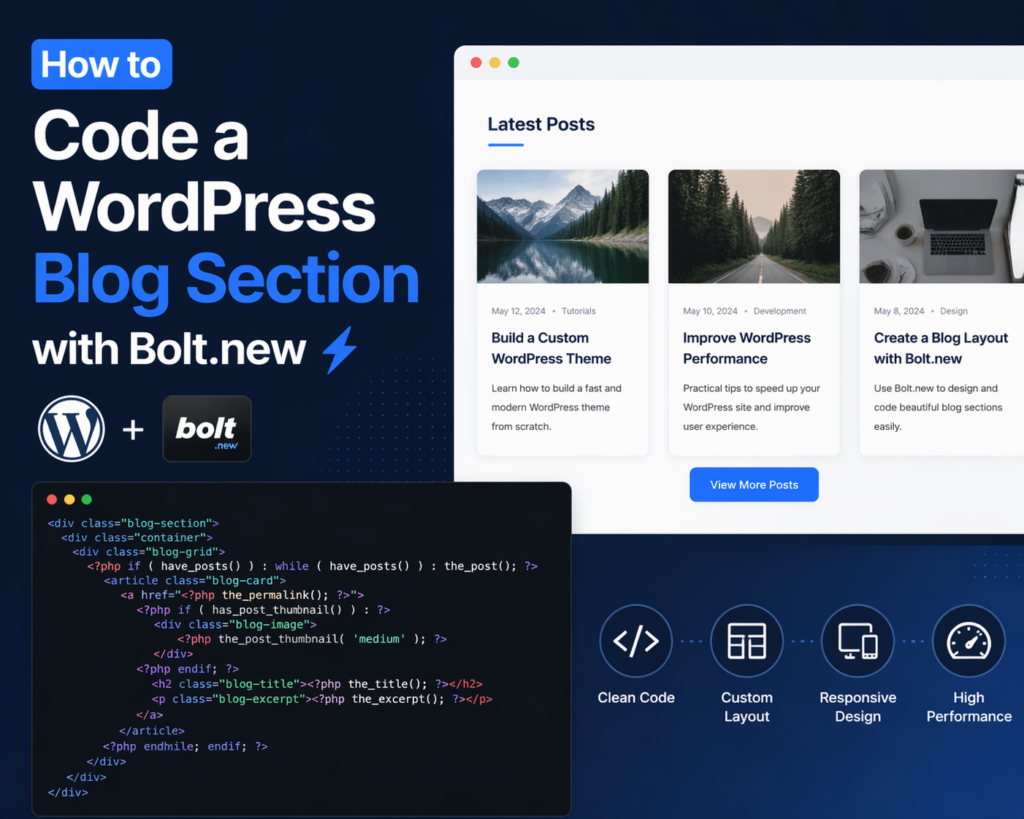
Building a modern, high-performing blog section is one of the most effective ways to enhance a วordpress website. Whether you’re aiming to improve SEO, increase engagement, or organize content more efficiently, a well-structured blog section plays a critical role. In recent years, tools like Bolt.new have made it easier to streamline development workflows, even for those who are not deeply technical.
In this guide, we’ll break down how to code a WordPress blog section with Bolt.new in a clear, beginner-friendly way. Instead of diving into overly complex development jargon, this article explains the process step by step, helping you understand both the logic and the practical implementation.
What Is Bolt.new and Why Use It?

Before diving into the coding process, it’s important to understand what Bolt.new is and why it matters.
Bolt.new is a modern development tool designed to simplify how developers and designers create components, layouts, and structured sections for websites. It allows you to quickly generate, test, and refine UI components—like a blog section—without starting from scratch every time.
Key Benefits
- Faster development workflow
- Clean, reusable code structure
- Easier customization for design-focused users
- Reduced reliance on heavy frameworks
For WordPress users, this means you can design a blog section that is both visually appealing and performance-friendly, without getting stuck in complex backend logic.
Understanding a WordPress Blog Section Structure
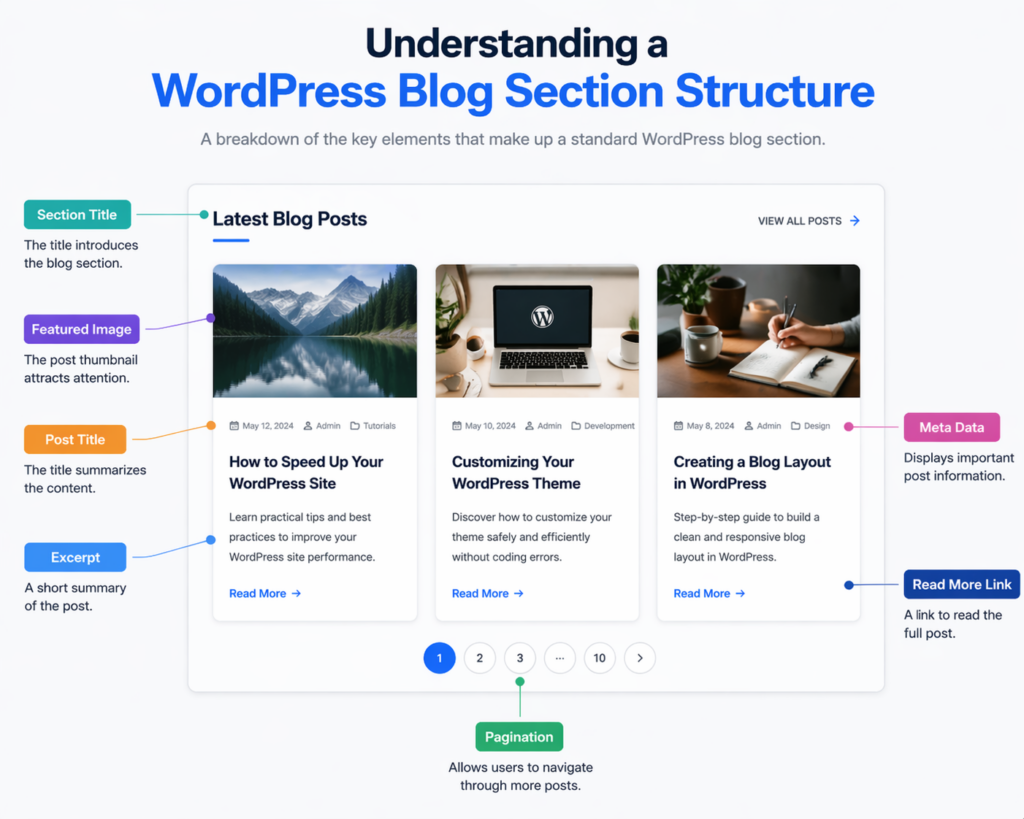
Before writing any code, you need to understand what a typical blog section includes. Most WordPress blog sections consist of:
- A container layout (grid or list)
- Featured images
- Post titles
- Excerpts or summaries
- Metadata (date, author, category)
- Pagination or load-more functionality
The goal is to organize these elements in a way that improves readability and user experience.
Step 1: Setting Up Your WordPress Environment
To begin coding your blog section, make sure your WordPress setup is ready.
Requirements
- A working WordPress installation
- Access to theme files (via FTP or dashboard)
- A child theme (recommended to avoid overwriting changes)
Using a child theme ensures your custom blog section won’t be lost during theme updates.
Step 2: Designing the Blog Layout with Bolt.new
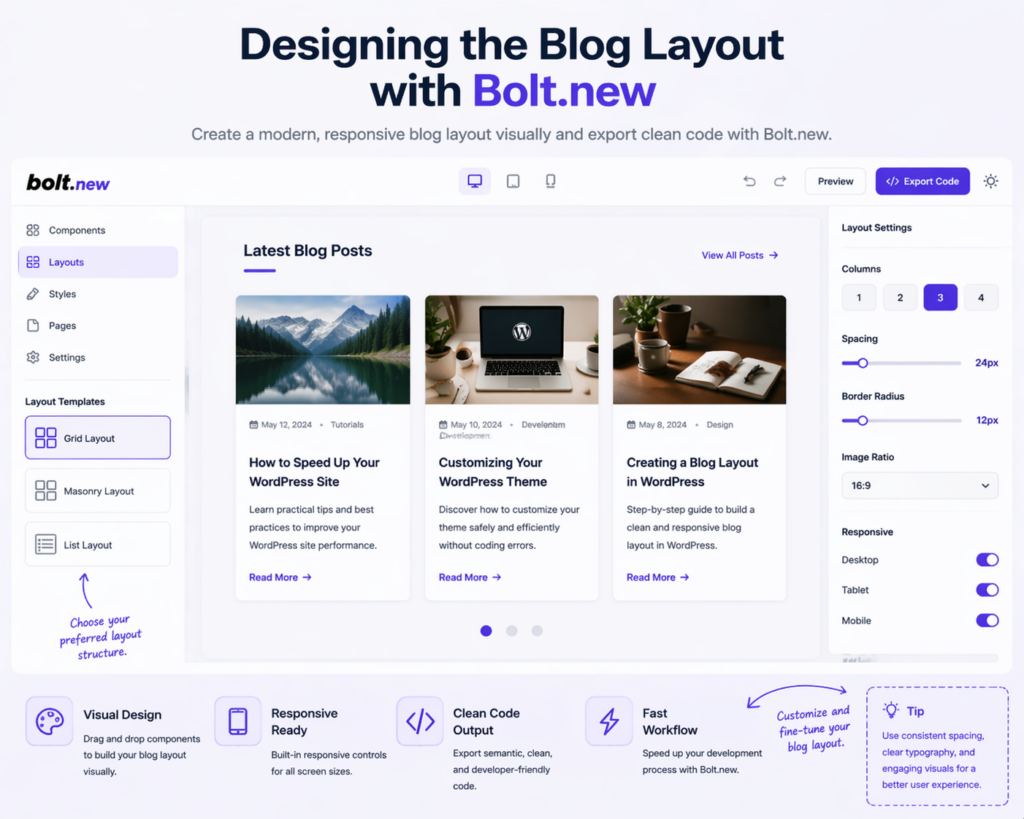
Bolt.new is particularly useful at the design stage. Instead of coding blindly, you can first structure your layout visually.
Common Layout Options
- Grid layout (popular for modern blogs)
- Masonry layout (dynamic, Pinterest-style)
- List layout (classic blog style)
For most use cases, a responsive grid layout works best because it balances readability and visual hierarchy.
Design Tips
- Keep spacing consistent
- Use clear typography hierarchy
- Ensure mobile responsiveness
- Avoid cluttered layouts
Bolt.new allows you to preview these structures quickly, helping you finalize your layout before moving into WordPress coding.
Step 3: Creating the Blog Section Template
Now it’s time to translate your design into WordPress code.
You’ll typically create or edit a template file such as:
home.phparchive.php- or a custom template like
blog-section.php
Basic Structure Example
<div class="blog-section">
  <div class="container">
    <div class="blog-grid">
      <?php if ( have_posts() ) : while ( have_posts() ) : the_post(); ?>
        <article class="blog-card">
          <a href="/th/</?php the_permalink(); ?>">
            <?php if ( has_post_thumbnail() ) : ?>
              <div class="blog-image">
                <?php the_post_thumbnail('medium'); ?>
              </div>
            <?php endif; ?>
            <h2 class="blog-title"><?php the_title(); ?></h2>
          </a>
          <p class="blog-excerpt"><?php the_excerpt(); ?></p>
        </article>
      <?php endwhile; endif; ?>
    </div>
  </div>
</div>
This is the foundation of your blog section. It pulls posts dynamically and displays them in a structured format.
Step 4: Styling the Blog Section (CSS)
Once the structure is in place, styling becomes essential.
Example CSS
.blog-section {
  padding: 60px 0;
}.blog-grid {
  display: grid;
  grid-template-columns: repeat(3, 1fr);
  gap: 30px;
}.blog-card {
  background: #fff;
  border-radius: 12px;
  overflow: hidden;
  transition: transform 0.3s ease;
}.blog-card:hover {
  transform: translateY(-5px);
}.blog-title {
  font-size: 20px;
  margin: 15px;
}.blog-excerpt {
  font-size: 14px;
  margin: 0 15px 20px;
}
Responsive Optimization
@media (max-width: 768px) {
  .blog-grid {
    grid-template-columns: 1fr;
  }
}
A responsive layout ensures your blog section performs well across all devices, which is crucial for both user experience and SEO.
Step 5: Enhancing Functionality with Bolt.new Logic
Bolt.new isn’t just about layout—it also helps you think in modular components.
You can break your blog section into reusable parts:
- Blog card component
- Image component
- Meta info component
This modular approach makes future updates much easier.
Example Improvements
- Add category filters
- Implement “Load More” button
- Include hover effects
- Add animations for engagement
Step 6: Adding Pagination or Load More
A blog section needs navigation for multiple posts.
Basic Pagination
<div class="pagination">
  <?php the_posts_pagination(); ?>
</div>
Load More (Optional)
Using AJAX for “Load More” improves user experience by avoiding full page reloads.
Step 7: Optimizing for SEO and Performance
A blog section isn’t just about design—it must also perform well.
SEO Best Practices
- Use proper heading tags (H1, H2, H3)
- Optimize image sizes
- Include descriptive alt text
- Ensure fast loading speed
Performance Tips
- Use lightweight CSS
- Avoid unnecessary scripts
- Enable caching
- Compress images
Step 8: Testing and Refinement
After building your blog section, testing is critical.
What to Check
- การตอบสนองต่ออุปกรณ์เคลื่อนที่
- Loading speed
- ลิงก์เสีย
- Layout consistency
Tools like browser developer tools can help you debug and refine the design.
ข้อผิดพลาดทั่วไปที่ควรหลีกเลี่ยง
When learning how to code a WordPress blog section with Bolt.new, beginners often make these mistakes:
- Overcomplicating the layout
- Ignoring mobile design
- Using too many plugins instead of clean code
- Not optimizing images
- Skipping testing phase
Keeping your design simple and structured usually leads to better results.
เหตุใดวิธีการนี้จึงได้ผล
Using Bolt.new alongside WordPress provides a balanced workflow:
- Design-first thinking ensures better user experience
- Clean coding structure improves maintainability
- Modular components allow easy updates
- Performance-focused layout enhances SEO
This combination is especially powerful for designers who want more control without diving too deep into backend development.
บทสรุป
Learning how to code a วordpress blog section with Bolt.new doesn’t have to be overwhelming. By breaking the process into clear steps—planning the layout, structuring the template, styling the design, and optimizing performance—you can build a blog section that is both functional and visually appealing.
Bolt.new simplifies the design process, while WordPress handles content management, making the two a strong combination. Focus on clarity, responsiveness, and performance, and your blog section will not only look great but also deliver real results in terms of user engagement and search visibility.
คำถามที่พบบ่อย
Bolt.new is a modern tool that helps streamline the process of designing and coding website components. It allows users to visually build layouts and generate clean code, making it easier to create WordPress blog sections efficiently.
Basic knowledge of HTML, CSS, and WordPress templates is helpful, but Bolt.new simplifies the process, making it accessible even for beginners who want to build structured blog layouts.
Common files include home.php, archive.php, or custom template files like blog-section.php. These templates control how blog posts are displayed on your site.
You can use CSS Grid or Flexbox along with media queries to ensure your blog layout adapts smoothly to different screen sizes, including mobile and tablet devices.
Yes, Bolt.new allows you to create custom layouts such as grid, list, or masonry styles, and then export clean code that can be integrated into your WordPress theme.
Focus on fast loading speed, clean design, proper heading structure, optimized images, and mobile responsiveness to improve both user experience and SEO performance.

ออกแบบและสร้างเว็บไซต์ WordPress หรือเว็บไซต์องค์กรพร้อมระบบอีคอมเมิร์ซครบวงจรสำหรับคุณ.
ช่วงราคา: $200.00 ถึง $2,500.00custom-requirements-or-special-quotations
ราคาเดิมคือ: $2.00.$1.00ราคาปัจจุบันคือ: $1.00. การใช้ปลั๊กอิน 50 ตัวมากเกินไปสำหรับร้านค้าออนไลน์ที่ใช้ WordPress หรือไม่?
การเข้าใจผลกระทบที่แท้จริงต่อประสิทธิภาพ การมีปลั๊กอิน 50 ตัวบนเว็บไซต์อีคอมเมิร์ซ WordPress ไม่ใช่ปัญหาโดยอัตโนมัติ จริงๆ แล้ว จำนวนเพียงอย่างเดียวแทบจะไม่สามารถกำหนดประสิทธิภาพได้....

ภาพหลักสำหรับการออกแบบอุปกรณ์กายภาพบำบัดที่บ้านของ Amazon (อธิบายรายละเอียด)
บทนำ: การสร้างภาพลักษณ์ที่น่าเชื่อถือสำหรับอุปกรณ์บำบัดที่บ้านบน Amazon เมื่อออกแบบภาพหลักสำหรับอุปกรณ์บำบัดที่บ้านบน Amazon สิ่งสำคัญอันดับแรกของเราคือ...

ภาพหลักสำหรับการแปลงลิปสติกเป็นสินค้าสำหรับ Amazon
บทนำ: การออกแบบภาพหลักลิปสติกที่ขายได้บน Amazon เมื่อเราออกแบบภาพหลักสำหรับลิปสติกบน Amazon ความรับผิดชอบของเราไม่ได้จำกัดอยู่แค่...

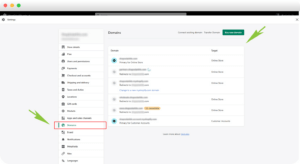
แฮกเกอร์ขโมยอีเมลผู้ดูแลระบบ WordPress ได้อย่างไร (และวิธีป้องกัน)
มาเริ่มกันด้วยความจริงที่ไม่น่าสบายใจ: อีเมลแอดมิน WordPress ของคุณอาจเปิดเผยต่อสาธารณะมากกว่าที่คุณคิด และแฮกเกอร์? พวกเขาชอบมาก สำหรับพวกเขา...
อะไรทำให้รองพื้นชนิดเหลวของ Amazon (ภาพหลัก) ขายดี?
บทนำ การออกแบบภาพหลักสำหรับรองพื้นชนิดเหลวบน Amazon ไม่ใช่แค่การทำให้ผลิตภัณฑ์ดูสวยงามเท่านั้น บน Amazon ภาพหลักและ...
การออกแบบภาพหลัก Amazon ที่มีประสิทธิภาพสำหรับตลับกรอง
บทนำ การออกแบบภาพหลักสำหรับ Amazon ไม่ใช่แค่การทำให้สินค้าดูน่าดึงดูดเท่านั้น แต่ยังเกี่ยวกับความชัดเจน ความน่าเชื่อถือ และความเข้าใจได้ในทันที โดยเฉพาะอย่างยิ่งสำหรับ...
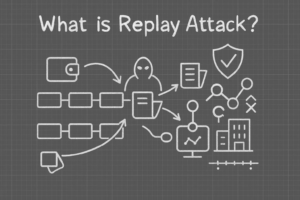
การโจมตีแบบ Replay Attack บน WordPress: ภัยคุกคามจริงหรือแค่เรื่องที่ถูกพูดเกินจริง?
ก่อนอื่นขอชี้แจงให้ชัดเจนก่อน การโจมตีแบบ Replay Attack นั้นดูไม่น่ากลัว มันไม่ได้ทำลายรหัสผ่าน มันไม่ได้แทรกโค้ดที่เป็นอันตรายพร้อมข้อความแฮ็กเกอร์สีเขียวกระจัดกระจายไปทั่ว มันแนบเนียนกว่า...

วิธีคัดลอกหน้าเว็บ WordPress โดยไม่ทำให้ระบบเสียหาย
ยอมรับกันเถอะ บางครั้งคุณอาจไม่อยากสร้างหน้าเว็บใหม่ คุณแค่อยากได้หน้าเว็บเดิม...แต่แตกต่างไปเล็กน้อย รูปแบบเหมือนเดิม บล็อกเหมือนเดิม การตั้งค่าเหมือนเดิม เพราะ...

เปรียบเทียบธีม WordPress สำหรับสัตว์เลี้ยง 5 แบบ
บทนำ การเลือกธีม WordPress ที่เหมาะสมสำหรับธุรกิจเกี่ยวกับสัตว์เลี้ยงนั้นไม่ใช่แค่เรื่องของการออกแบบเท่านั้น แต่ยังส่งผลโดยตรงต่อการใช้งาน ความสามารถในการขยายขนาด และการเติบโตของธุรกิจในระยะยาว การดูแลสัตว์เลี้ยงและ...

เปรียบเทียบธีมอีคอมเมิร์ซชุดว่ายน้ำ 5 แบบ
บทนำ การเลือกธีมที่เหมาะสมสำหรับร้านค้าอิสระที่จำหน่ายชุดว่ายน้ำหรือชุดชั้นในนั้นไม่ใช่แค่การตัดสินใจด้านภาพลักษณ์เท่านั้น แต่ยังส่งผลโดยตรงต่ออัตราการเปลี่ยนลูกค้าให้เป็นผู้ซื้อ ความสามารถในการขยายธุรกิจ และความยั่งยืนในระยะยาว...

วิธีปิดการแสดงความคิดเห็นใน WordPress (โดยไม่ต้องเสียสติ)
มาพูดถึงระบบแสดงความคิดเห็นของ WordPress กันดีกว่า ในทางทฤษฎีแล้ว ความคิดเห็นนั้นยอดเยี่ยมมาก มันช่วยกระตุ้นการสนทนา สร้างชุมชน และทำให้เว็บไซต์ของคุณดูมีชีวิตชีวา แต่ในความเป็นจริงแล้ว มันมักจะเป็นเหมือนแม่เหล็กดึงดูด...

ข้อผิดพลาด WordPress 500: เมื่อเว็บไซต์ของคุณเกิดอาการผิดปกติ
เว็บไซต์ WordPress ของคุณยังใช้งานได้ปกติดีเมื่อสักครู่ คุณรีเฟรชหน้าเว็บ แล้วจู่ๆ ก็เกิดข้อผิดพลาด 500 Internal Server Error ขึ้นมา ไม่มีคำอธิบาย ไม่มีคำขอโทษ มีเพียงข้อความที่เย็นชาและสับสนซึ่งโดยพื้นฐานแล้ว...

การสร้างเว็บไซต์ WordPress ที่ปรับขนาดได้สำหรับแบรนด์ที่ขับเคลื่อนด้วยวิทยาศาสตร์: โครงการ AminoUSA
บทนำ ในยุคดิจิทัลปัจจุบัน เว็บไซต์เป็นมากกว่าแค่สถานที่สำหรับแสดงรายการสินค้า สำหรับแบรนด์ที่ขับเคลื่อนด้วยวิทยาศาสตร์ซึ่งดำเนินงานในอุตสาหกรรมที่มีการควบคุมหรือเน้นการวิจัย...

สร้างร้านค้า Shopify ที่ปรับขนาดได้สำหรับแบรนด์ใบมีดระดับโลก: โครงการ CoolKatana
บทนำ ในธุรกิจอีคอมเมิร์ซข้ามพรมแดน เว็บไซต์ Shopify เป็นมากกว่าแค่หน้าร้าน สำหรับแบรนด์ที่ดำเนินธุรกิจในกลุ่มเฉพาะหรือกลุ่มที่ขับเคลื่อนด้วยวัฒนธรรม เว็บไซต์ต้องทำมากกว่านั้น...
การออกแบบร้านค้า Shopify ที่มีอัตราการแปลงสูงสำหรับขายการ์ดโปเกมอน
บทนำ ในโลกของอีคอมเมิร์ซสินค้าสะสม โดยเฉพาะอย่างยิ่งในตลาดเกมการ์ดโปเกมอน (TCG) เว็บไซต์จะต้องทำมากกว่าแค่แสดงรายการสินค้า...
ดีไซน์ Shopify ที่เพิ่มยอดขายสำหรับแบรนด์อิฐสั่งทำพิเศษ
บทนำ ในสภาพแวดล้อมการแข่งขันอีคอมเมิร์ซในปัจจุบัน โดยเฉพาะอย่างยิ่งในตลาดของขวัญส่วนบุคคลและของสะสม เว็บไซต์ Shopify ต้องทำมากกว่าแค่แสดงสินค้า...

วิธีติดต่อฝ่ายสนับสนุนของ Shopify: คู่มือที่ง่ายและไม่ยุ่งยาก
การบริหารร้านค้า Shopify ควรเป็นเรื่องที่น่าตื่นเต้น ไม่ใช่เรื่องที่ทำให้สับสน เมื่อมีคำถามหรือปัญหาเกิดขึ้น Shopify มีช่องทางการสนับสนุนหลายช่องทาง ขึ้นอยู่กับสถานการณ์...
วิธีปิดใช้งานร้านค้า Shopify: คู่มือที่ชัดเจนและใช้งานได้จริง
การปิดใช้งานร้านค้า Shopify นั้นไม่ซับซ้อน แต่ก็มีผลกระทบหลายอย่างที่ผู้ขายหลายรายมองข้ามไป คู่มือนี้จะอธิบายขั้นตอนอย่างละเอียดและเข้าใจง่าย...