Keine Produkte im Warenkorb.
Website speed is one of the most important parts of running a healthy WordPress site. A slow website can frustrate visitors, weaken user experience, and make it harder for search engines to understand your site as fast and reliable. That is why many WordPress users look for caching and optimization tools that can reduce loading time without requiring advanced technical work.
One popular option is LiteSpeed Cache for WordPress, often called LSCache or LSCWP. It is a WordPress optimization plugin created by LiteSpeed Technologies. The plugin can cache pages, optimize images, improve CSS and JavaScript delivery, connect with QUIC.cloud, and help reduce unnecessary server work. Some cache-related functions work best on LiteSpeed Web Server or OpenLiteSpeed, while many optimization features can also work on other servers such as Apache or Nginx.
This guide explains how to configure LSCache WordPress in a practical, beginner-friendly way. Instead of treating every setting as a technical switch, we will look at what each major area does, why it matters, and how you can use it safely.
LiteSpeed Cache for WordPress is more than a simple cache plugin. A traditional cache plugin usually creates static versions of pages so the server does not need to rebuild the same page again and again. LSCache does that, but it also includes tools for image optimization, database cleanup, CSS and JavaScript optimization, browser cache settings, CDN integration, and page performance improvements.
The main idea is simple: when a visitor opens a page, WordPress normally needs to run PHP scripts, query the database, load theme files, load plugin files, and assemble the final page. This takes time. With caching, a saved version of the page can be served faster. That reduces the load on the server and helps visitors see content more quickly.
However, LSCache is not a magic button. The best results come from configuring it carefully. Some settings can improve speed, while others may break layouts, delay dynamic content, or create conflicts with other optimization plugins. The goal is to improve performance without damaging the user experience.
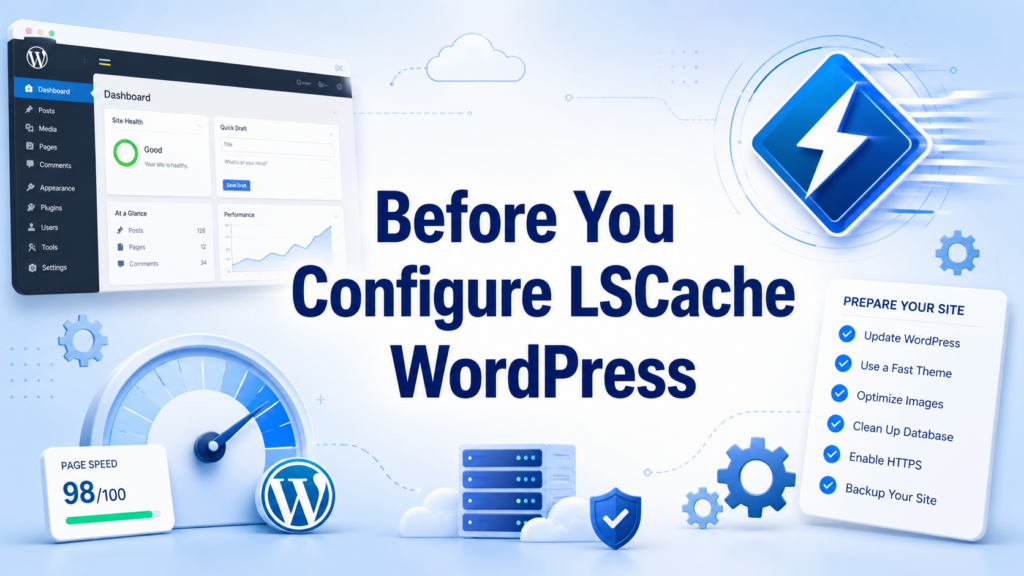
Before changing settings, it is smart to prepare your site. First, create a full backup of your WordPress files and database. Optimization settings can usually be reversed, but a backup gives you a safe recovery point.
Second, test your current website speed. You can use tools like PageSpeed Insights, GTmetrix, or WebPageTest. Run more than one test because the first result may not show the full effect of caching. Cache tools often need one visit to generate the cache and another visit to show the cached version.
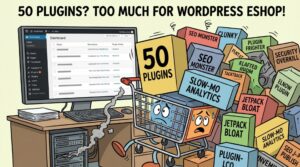
Third, avoid using multiple plugins for the same job. For example, do not run several cache, image optimization, CSS minification, or JavaScript delay plugins at the same time. When several plugins try to modify the same files, they can create broken layouts, missing images, or scripts that stop working.
To start, log in to your WordPress dashboard. Go to Plugins → Add New, search for LiteSpeed Cache, install it, and activate it. Some hosting providers include LSCache by default, especially if the server uses LiteSpeed. If it is already installed, you can go directly to the settings.
After activation, you should see a LiteSpeed Cache menu in your WordPress dashboard. This menu contains several sections, including General, Cache, Page Optimization, Image Optimization, CDN, Database, Crawler, Toolbox, and Presets.
The General section is where you connect LSCache with extra services and control basic plugin behavior.
One of the first options is Automatically Upgrade. Turning this on allows the plugin to update automatically. This can be useful for security and compatibility, but some users prefer to update manually after checking whether the new version causes any issues. For most small business websites, automatic updates are convenient, but if your site is complex, manual updates may give you more control.
Next, you may see the option to request a Domain Key. This key connects your site to QUIC.cloud services, which are used for features like image optimization and CDN-related functions. Hostinger’s guide notes that QUIC.cloud-related features require this domain key.
You may also see Guest Mode and Guest Optimization. Guest Mode can serve a general cached version of the page to first-time visitors before loading a more personalized version later. This may improve first-page loading speed, especially for anonymous visitors. Guest Optimization can go further by applying optimization for guest visitors, but it may use more server resources. If your hosting plan is limited, test this setting carefully before leaving it enabled.
The Cache section is the heart of LSCache. This is where you decide what WordPress content should be cached.
The most important setting is Enable Cache. This should usually be turned on. Without it, LSCache cannot perform its main page caching function.
Cache Logged-in Users is usually better left off unless you run a membership site, course platform, or private user dashboard. Logged-in users often see personalized content, so caching those pages incorrectly can create confusing results.
Cache Commenters can usually stay off. If your site uses comments, especially comments held for moderation, caching commenters may affect what visitors see after submitting a comment.
Cache REST API is often safe to enable. WordPress themes, plugins, and the block editor may use REST API requests. Caching them can help reduce repeated server work.
Cache Login Page can usually stay on. This may help the login page respond faster, although security plugins and custom login pages should be tested after enabling it.
Cache favicon.ico and Cache PHP Resources should usually stay on. These settings help reduce unnecessary backend processing for small resources that do not need to be regenerated every time.
Cache Mobile requires more careful thinking. If your desktop and mobile sites use the same content and responsive design, you may not need a separate mobile cache. If your site serves different content to mobile visitors, then mobile cache can be useful. After enabling it, always test the mobile version of your website.
TTL means Time To Live. It controls how long cached content stays valid before LSCache refreshes it. Default TTL settings are usually fine for most websites. If your site changes constantly, you may use shorter TTL values. If your site is mostly static, longer values may be acceptable.
The Purge section controls when old cached content should be cleared. You should allow cache purging when posts, pages, products, themes, or plugins are updated. This prevents visitors from seeing outdated content.
The Excludes section is important for pages that should not be cached. For example, cart pages, checkout pages, account pages, forms, and other dynamic pages should be handled carefully. Many eCommerce plugins already define these exclusions, but you should still test them. A checkout page that serves cached content can create serious user experience problems.
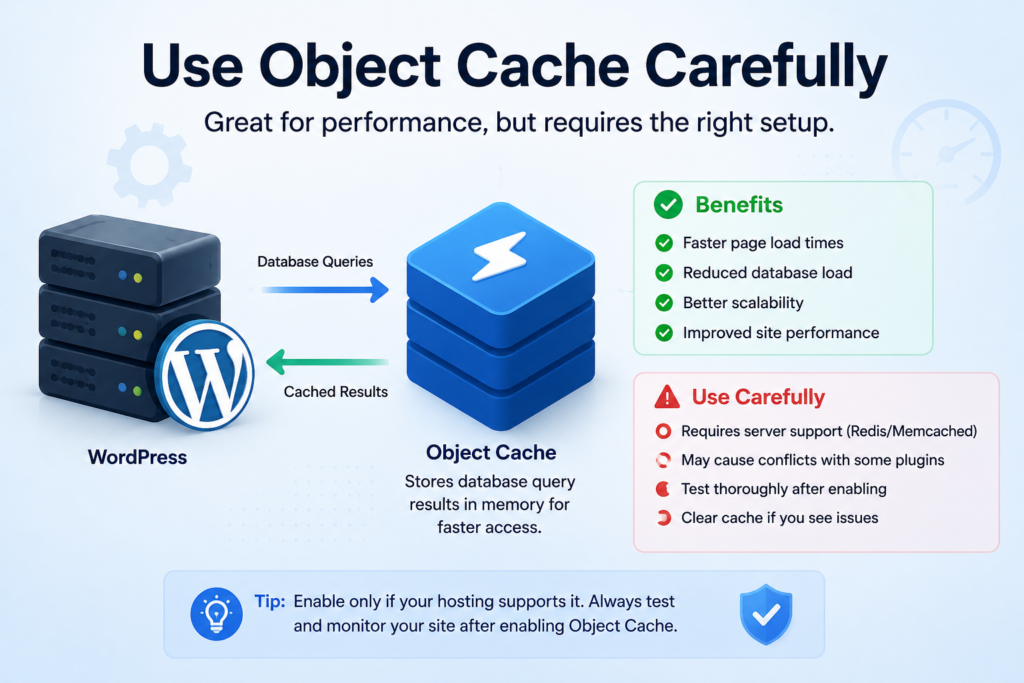
Object cache stores database query results so WordPress does not have to repeat the same database work as often. This can be helpful for dynamic websites, WooCommerce stores, membership sites, and sites with many plugins.
However, object cache usually requires server support, such as Redis or Memcached. If your hosting provider supports it, you can enable object cache inside LSCache and choose the method your server provides. If your host does not support object cache, turning it on may not help.
After enabling object cache, browse your site, test the admin dashboard, test product pages, and check forms. If you notice strange behavior, disable it and ask your hosting provider whether the server environment supports it correctly.
Browser cache tells visitors’ browsers to store certain static files, such as images, CSS, JavaScript, and fonts. This helps repeat visitors load your site faster because their browser does not need to download the same files again.
In LSCache, browser caching is usually safe to enable. It is especially useful for websites with many images or design assets. The only thing to remember is that if you change images, fonts, or CSS, some visitors may still see the older cached version until the browser cache expires. In most cases, this is not a major problem.
Images are often one of the biggest reasons WordPress websites load slowly. Large product photos, banners, blog images, and background images can add several megabytes to a page.
LSCache includes image optimization features that can compress images, create WebP versions, and replace older image formats with lighter versions. Hostinger’s guide explains that LiteSpeed Cache can optimize images individually or in bulk, and QUIC.cloud is used for some image optimization workflows.
Start by requesting a domain key if required. Then go to the Image Optimization section.
Recommended beginner-friendly settings usually include:
Auto Request Cron: On
This allows LSCache to automatically send new images for optimization.
Auto Pull Cron: On
This pulls optimized images back to your WordPress site automatically.
Optimize Original Images: On
This compresses your uploaded JPG and PNG images.
Remove Original Backups: Off
Do not remove original backups unless you are sure. Once backups are removed, it may be difficult to restore the original image quality.
Optimize Losslessly: On
Lossless compression reduces file size without visibly damaging image quality.
Create WebP Versions: On
WebP images are usually smaller than JPG or PNG images, which can improve loading speed.
Image WebP Replacement: On
This allows WordPress to serve WebP versions instead of heavier image files when supported.
After enabling image optimization, test your website visually. Check banners, product images, galleries, blog thumbnails, and mobile images. Make sure nothing looks blurry, missing, or incorrectly cropped.
CSS controls the visual styling of your website. LSCache can reduce CSS file size and change how CSS loads.
CSS Minify is usually safe to enable. It removes unnecessary spaces, line breaks, and comments from CSS files. This makes files smaller without changing the design.
CSS Combine should be used carefully. In the past, combining CSS files was often useful because browsers handled fewer requests better. Today, with HTTP/2 and HTTP/3, combining files is not always necessary. It may also cause layout issues on some themes. Start with CSS Minify first, then test CSS Combine only if needed.
Generate UCSS creates used CSS and removes unused CSS from page loading. This can improve performance scores, but it may also hide styling that appears after interaction, such as menus, tabs, popups, sliders, or product filters. Use it carefully and test the site on desktop and mobile.
JavaScript controls interactive functions such as sliders, menus, forms, carts, filters, animations, popups, and tracking scripts. Because of this, JavaScript optimization is powerful but risky.
JS Minify is usually a good first step. Like CSS minification, it reduces file size by removing unnecessary characters.
JS Combine should be tested carefully. It may break theme or plugin functions if scripts rely on a specific loading order.
Load JS Deferred can improve loading speed by delaying JavaScript until after the main page content loads. This may improve performance scores, but it can also affect sliders, menus, or above-the-fold animations.
Delay JS is even more aggressive. It delays JavaScript until the user interacts with the page. This can improve speed scores, but it may delay important functions like chat widgets, tracking scripts, sticky headers, or add-to-cart buttons. If you use Delay JS, test every key action on the site.
For beginners, it is better to turn on one JavaScript setting at a time, clear the cache, and test the site before enabling another one.
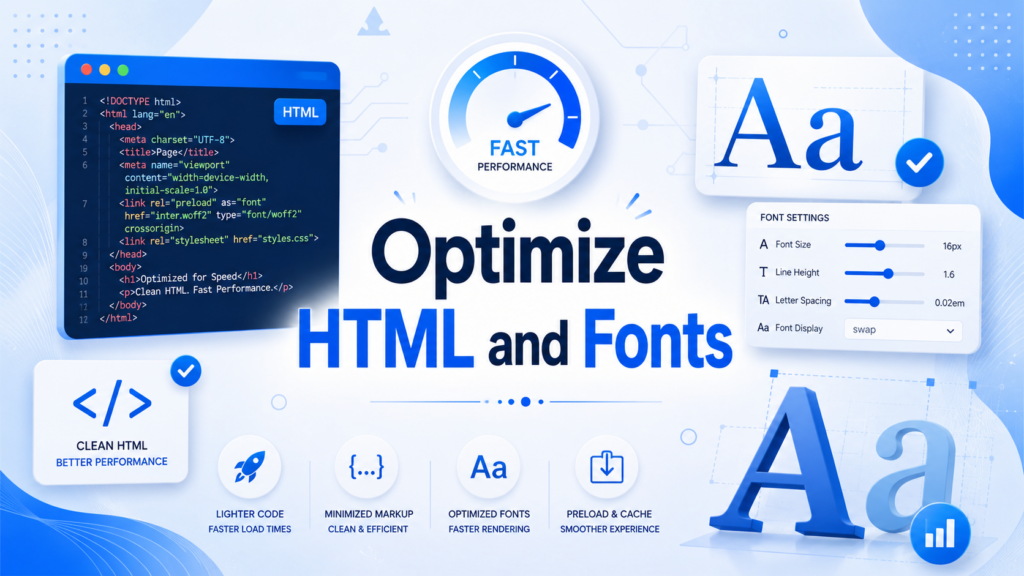
HTML minification is usually safe. It removes unnecessary whitespace from the page source and can slightly reduce page size.
Font optimization depends on how your site loads fonts. If you use Google Fonts, custom fonts, or many font weights, your page can slow down. Try to use fewer font families and fewer font weights. For example, using regular, medium, and bold is usually enough for most websites.
LSCache may include options to load fonts asynchronously or optimize font display. Test these settings visually, especially on mobile. Poor font loading can cause layout shifts, where text jumps after the page begins loading.
A CDN, or Content Delivery Network, stores copies of your site’s static files on servers in different regions. This helps visitors load files from a location closer to them.
LSCache can connect with QUIC.cloud CDN and may also work with other CDN services. If most of your visitors are local and your hosting is already fast, CDN setup may not be urgent. If your visitors come from different countries, a CDN can improve global loading speed.
When using a CDN, test images, fonts, CSS files, JavaScript files, and checkout pages. Make sure your SSL certificate works correctly and that no mixed-content warnings appear.
Over time, WordPress collects post revisions, transients, spam comments, trashed posts, expired data, and other database leftovers. LSCache includes database cleanup tools that can remove unnecessary data.
This can make the database lighter, but you should be careful. Before cleaning the database, create a backup. Some revisions or temporary data may be useful. For most sites, cleaning spam comments, trashed posts, and expired transients is safe, but deleting all revisions may remove old content versions you might want later.
The biggest mistake beginners make is turning on too many settings at once. If the site breaks, they do not know which setting caused the problem.
A better process is:
Enable one group of settings.
Clear all cache.
Open the site in an incognito window.
Test desktop and mobile.
Check important pages.
Run a performance test.
Continue only if everything works.
For a blog, check the homepage, blog archive, single post, search page, and contact form. For WooCommerce, check the homepage, shop page, product page, cart, checkout, account page, coupon field, and payment flow.
If your layout breaks, turn off CSS Combine, UCSS, or CSS asynchronous loading first. These settings often affect design.
If menus, sliders, tabs, or buttons stop working, check JavaScript settings. Disable JS Combine, JS Defer, or Delay JS and test again.
If updated content does not appear, purge all cache. Also check browser cache and CDN cache.
If images disappear, review WebP replacement, lazy loading, and CDN settings.
If WooCommerce cart or checkout behaves strangely, make sure cart, checkout, and account pages are excluded from caching.
For many standard WordPress websites, a safe starting point looks like this:
Enable page cache.
Enable browser cache.
Enable image optimization.
Enable WebP generation and replacement.
Enable CSS minify.
Enable JS minify.
Keep CSS Combine off at first.
Keep JS Combine off at first.
Use Delay JS only after careful testing.
Exclude dynamic pages from caching.
Use database cleanup occasionally, not blindly.
This setup gives a good balance between speed and stability. After that, advanced users can test more aggressive settings.
Learning how to configure LSCache WordPress is mainly about understanding what each optimization feature does and applying settings in the right order. LSCache can improve speed through page caching, browser caching, image optimization, WebP delivery, CSS and JavaScript optimization, CDN support, object cache, and database cleanup. The safest method is to start with basic caching, optimize images, enable simple minification, and test carefully before using advanced settings. A well-configured LSCache setup can make a WordPress site faster, lighter, and more stable without requiring complicated development work.
LSCache, or LiteSpeed Cache, is a WordPress caching and performance optimization plugin. It helps speed up a website by storing cached versions of pages, optimizing images, reducing file size, and improving how CSS, JavaScript, HTML, and fonts load.
You can install the LiteSpeed Cache plugin on many WordPress sites, but full page caching works best on LiteSpeed Web Server or OpenLiteSpeed. Some optimization features, such as image optimization, database cleanup, and CSS/JS optimization, may still work on other hosting environments.
The safest way is to enable one setting group at a time. Start with page cache, browser cache, and image optimization. Then test CSS minify, JS minify, WebP images, and database cleanup. Avoid enabling too many advanced settings at once.
Yes, some optimization settings may affect layouts or interactive features. CSS Combine, Generate UCSS, JS Combine, JS Defer, and Delay JS can sometimes break menus, sliders, forms, or buttons. If something looks wrong, disable the latest setting and clear the cache.
Object Cache can improve performance by storing database query results, but it requires proper server support such as Redis or Memcached. Enable it only if your hosting environment supports it, and test your website carefully afterward.
LSCache can support SEO by improving loading speed and user experience. Faster pages may reduce bounce rates and help visitors browse more smoothly. However, LSCache does not replace good content, proper site structure, mobile usability, and technical SEO basics.