


소개
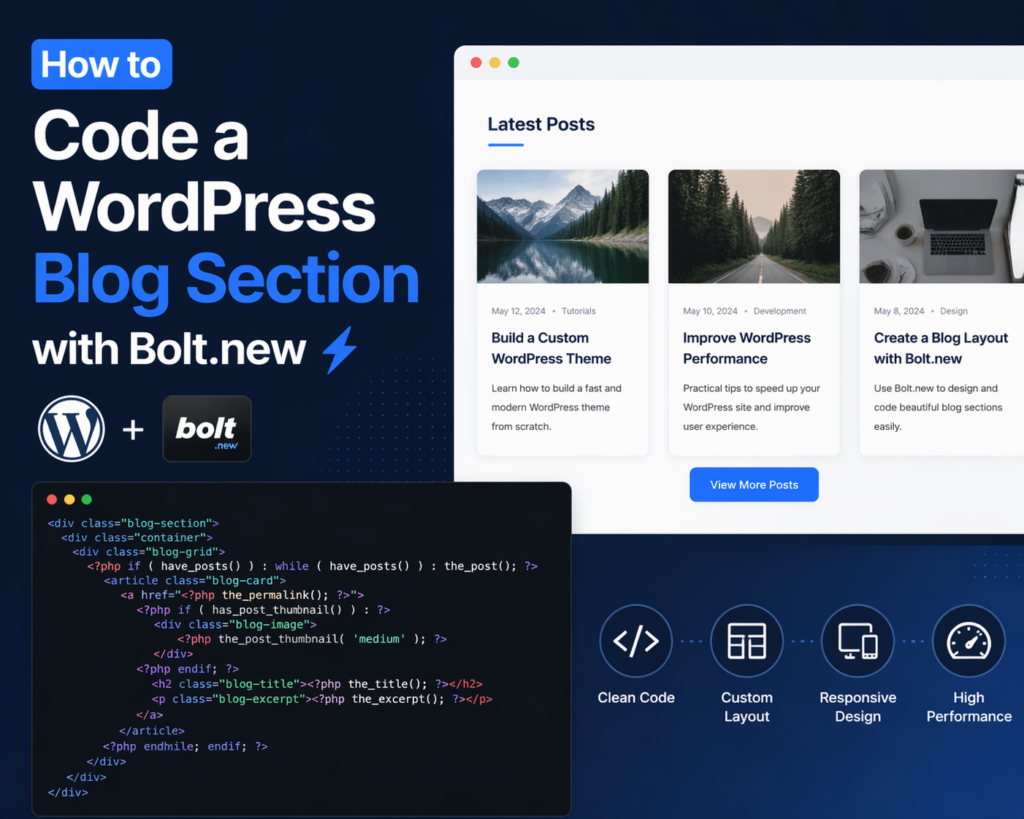
Building a modern, high-performing blog section is one of the most effective ways to enhance a 워드프레스 website. Whether you’re aiming to improve SEO, increase engagement, or organize content more efficiently, a well-structured blog section plays a critical role. In recent years, tools like Bolt.new have made it easier to streamline development workflows, even for those who are not deeply technical.
In this guide, we’ll break down how to code a WordPress blog section with Bolt.new in a clear, beginner-friendly way. Instead of diving into overly complex development jargon, this article explains the process step by step, helping you understand both the logic and the practical implementation.
What Is Bolt.new and Why Use It?
Before diving into the coding process, it’s important to understand what Bolt.new is and why it matters.
Bolt.new is a modern development tool designed to simplify how developers and designers create components, layouts, and structured sections for websites. It allows you to quickly generate, test, and refine UI components—like a blog section—without starting from scratch every time.
Key Benefits
- Faster development workflow
- Clean, reusable code structure
- Easier customization for design-focused users
- Reduced reliance on heavy frameworks
For WordPress users, this means you can design a blog section that is both visually appealing and performance-friendly, without getting stuck in complex backend logic.
Understanding a WordPress Blog Section Structure
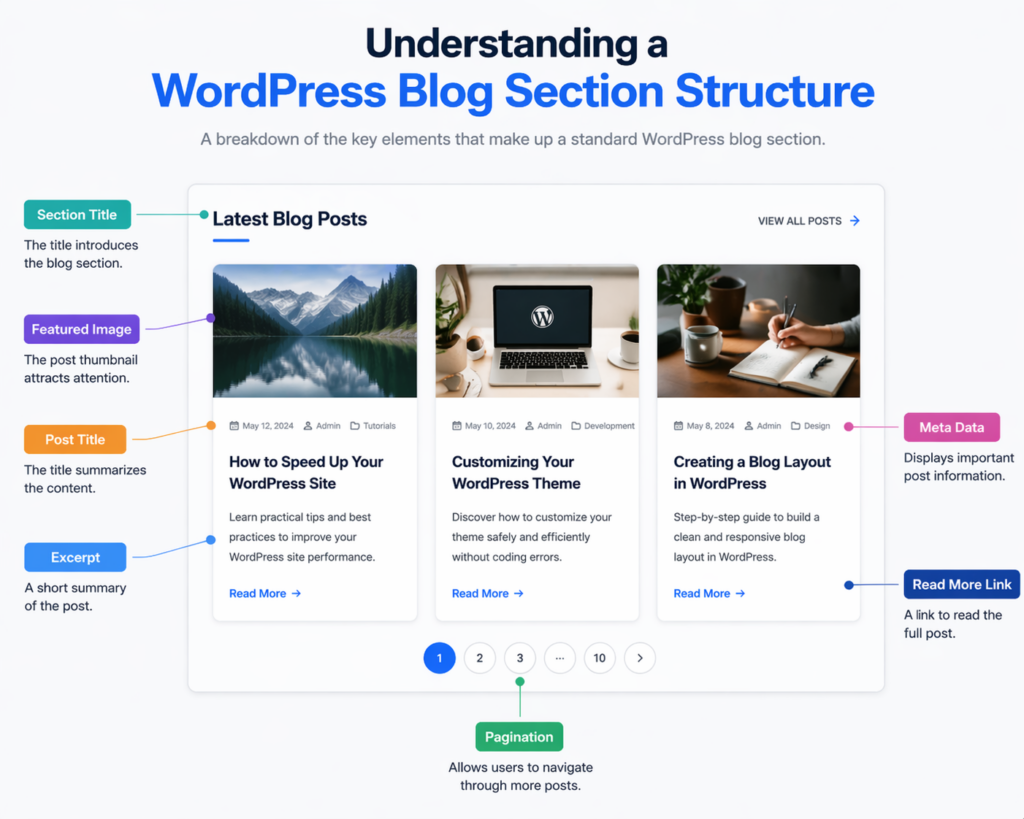
Before writing any code, you need to understand what a typical blog section includes. Most WordPress blog sections consist of:
- A container layout (grid or list)
- Featured images
- Post titles
- Excerpts or summaries
- Metadata (date, author, category)
- Pagination or load-more functionality
The goal is to organize these elements in a way that improves readability and user experience.
Step 1: Setting Up Your WordPress Environment
To begin coding your blog section, make sure your WordPress setup is ready.
Requirements
- A working WordPress installation
- Access to theme files (via FTP or dashboard)
- A child theme (recommended to avoid overwriting changes)
Using a child theme ensures your custom blog section won’t be lost during theme updates.
Step 2: Designing the Blog Layout with Bolt.new
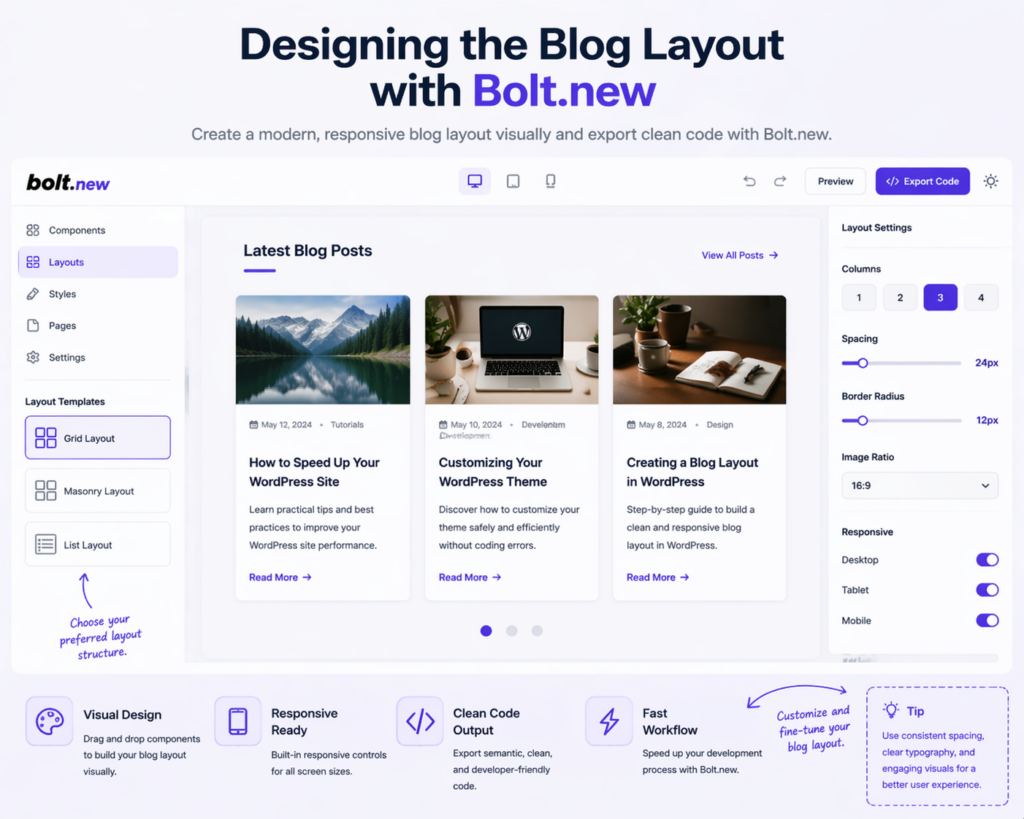
Bolt.new is particularly useful at the design stage. Instead of coding blindly, you can first structure your layout visually.
Common Layout Options
- Grid layout (popular for modern blogs)
- Masonry layout (dynamic, Pinterest-style)
- List layout (classic blog style)
For most use cases, a responsive grid layout works best because it balances readability and visual hierarchy.
Design Tips
- Keep spacing consistent
- Use clear typography hierarchy
- Ensure mobile responsiveness
- Avoid cluttered layouts
Bolt.new allows you to preview these structures quickly, helping you finalize your layout before moving into WordPress coding.
Step 3: Creating the Blog Section Template
Now it’s time to translate your design into WordPress code.
You’ll typically create or edit a template file such as:
home.phparchive.php- or a custom template like
blog-section.php
Basic Structure Example
<div class="blog-section">
  <div class="container">
    <div class="blog-grid">
      <?php if ( have_posts() ) : while ( have_posts() ) : the_post(); ?>
        <article class="blog-card">
          <a href="/ko/</?php the_permalink(); ?>">
            <?php if ( has_post_thumbnail() ) : ?>
              <div class="blog-image">
                <?php the_post_thumbnail('medium'); ?>
              </div>
            <?php endif; ?>
            <h2 class="blog-title"><?php the_title(); ?></h2>
          </a>
          <p class="blog-excerpt"><?php the_excerpt(); ?></p>
        </article>
      <?php endwhile; endif; ?>
    </div>
  </div>
</div>
This is the foundation of your blog section. It pulls posts dynamically and displays them in a structured format.
Step 4: Styling the Blog Section (CSS)
Once the structure is in place, styling becomes essential.
Example CSS
.blog-section {
  padding: 60px 0;
}.blog-grid {
  display: grid;
  grid-template-columns: repeat(3, 1fr);
  gap: 30px;
}.blog-card {
  background: #fff;
  border-radius: 12px;
  overflow: hidden;
  transition: transform 0.3s ease;
}.blog-card:hover {
  transform: translateY(-5px);
}.blog-title {
  font-size: 20px;
  margin: 15px;
}.blog-excerpt {
  font-size: 14px;
  margin: 0 15px 20px;
}
Responsive Optimization
@media (max-width: 768px) {
  .blog-grid {
    grid-template-columns: 1fr;
  }
}
A responsive layout ensures your blog section performs well across all devices, which is crucial for both user experience and SEO.
Step 5: Enhancing Functionality with Bolt.new Logic
Bolt.new isn’t just about layout—it also helps you think in modular components.
You can break your blog section into reusable parts:
- Blog card component
- Image component
- Meta info component
This modular approach makes future updates much easier.
Example Improvements
- Add category filters
- Implement “Load More” button
- Include hover effects
- Add animations for engagement
Step 6: Adding Pagination or Load More
A blog section needs navigation for multiple posts.
Basic Pagination
<div class="pagination">
  <?php the_posts_pagination(); ?>
</div>
Load More (Optional)
Using AJAX for “Load More” improves user experience by avoiding full page reloads.
Step 7: Optimizing for SEO and Performance
A blog section isn’t just about design—it must also perform well.
SEO Best Practices
- Use proper heading tags (H1, H2, H3)
- Optimize image sizes
- Include descriptive alt text
- Ensure fast loading speed
Performance Tips
- Use lightweight CSS
- Avoid unnecessary scripts
- Enable caching
- Compress images
Step 8: Testing and Refinement
After building your blog section, testing is critical.
What to Check
- 모바일 반응형 디자인
- Loading speed
- 깨진 링크
- Layout consistency
Tools like browser developer tools can help you debug and refine the design.
흔히 저지르는 실수들을 피하는 방법
When learning how to code a WordPress blog section with Bolt.new, beginners often make these mistakes:
- Overcomplicating the layout
- Ignoring mobile design
- Using too many plugins instead of clean code
- Not optimizing images
- Skipping testing phase
Keeping your design simple and structured usually leads to better results.
이 접근 방식이 효과적인 이유
Using Bolt.new alongside WordPress provides a balanced workflow:
- Design-first thinking ensures better user experience
- Clean coding structure improves maintainability
- Modular components allow easy updates
- Performance-focused layout enhances SEO
This combination is especially powerful for designers who want more control without diving too deep into backend development.
결론
Learning how to code a 워드프레스 blog section with Bolt.new doesn’t have to be overwhelming. By breaking the process into clear steps—planning the layout, structuring the template, styling the design, and optimizing performance—you can build a blog section that is both functional and visually appealing.
Bolt.new simplifies the design process, while WordPress handles content management, making the two a strong combination. Focus on clarity, responsiveness, and performance, and your blog section will not only look great but also deliver real results in terms of user engagement and search visibility.
자주 묻는 질문
Bolt.new is a modern tool that helps streamline the process of designing and coding website components. It allows users to visually build layouts and generate clean code, making it easier to create WordPress blog sections efficiently.
Basic knowledge of HTML, CSS, and WordPress templates is helpful, but Bolt.new simplifies the process, making it accessible even for beginners who want to build structured blog layouts.
Common files include home.php, archive.php, or custom template files like blog-section.php. These templates control how blog posts are displayed on your site.
You can use CSS Grid or Flexbox along with media queries to ensure your blog layout adapts smoothly to different screen sizes, including mobile and tablet devices.
Yes, Bolt.new allows you to create custom layouts such as grid, list, or masonry styles, and then export clean code that can be integrated into your WordPress theme.
Focus on fast loading speed, clean design, proper heading structure, optimized images, and mobile responsiveness to improve both user experience and SEO performance.

완전한 전자상거래 시스템을 갖춘 워드프레스 웹사이트 또는 기업 사이트를 디자인하고 구축하세요.
가격 범위: $200.00~$2,500.00custom-requirements-or-special-quotations
원래 가격: $2.00.$1.00현재 가격: $1.00. 워드프레스 전자상거래 쇼핑몰에 플러그인 50개는 너무 많은 걸까요?
실제 성능에 미치는 영향 이해하기 워드프레스 전자상거래 사이트에 50개의 플러그인이 있다고 해서 자동으로 문제가 되는 것은 아닙니다. 사실 그 숫자만으로 성능이 결정되는 경우는 거의 없습니다....

아마존 가정용 물리치료 기기 메인 이미지 디자인 설명
소개 소개: 아마존에서 홈 테라피 기기의 신뢰할 수 있는 이미지 구축 아마존에서 홈 테라피 기기의 기본 이미지를 디자인할 때 기본 ...

아마존 립스틱 전환을 위한 메인 이미지 디자인
소개: 소개: 아마존에서 판매되는 립스틱 메인 이미지 디자인하기 아마존 립스틱의 메인 이미지를 디자인할 때 우리의 책임은 그 이상입니다.

해커들이 워드프레스 관리자 이메일을 훔치는 방법(그리고 이를 막는 방법)
불편한 진실부터 말씀드리자면, 워드프레스 관리자 이메일은 생각보다 훨씬 더 많이 공개되어 있습니다. 그들은 그것을 좋아합니다. 해커에게 여러분의...
아마존 리퀴드 파운데이션 메인 이미지 변환의 특징은 무엇일까요?
서론 아마존 리퀴드 파운데이션의 메인 이미지 디자인은 단순히 제품을 아름답게 보이게 하는 것만이 아닙니다. 아마존에서 메인 이미지와...
필터 카트리지 제품을 위한 효과적인 아마존 메인 이미지 디자인하기
서론 아마존 메인 이미지 디자인은 단순히 제품을 매력적으로 보이게 하는 것만이 아닙니다. 명확성, 신뢰, 그리고 즉각적인 이해를 제공하는 것이 중요합니다. 특히...
워드프레스에 대한 리플레이 공격: 실제 위협인가, 과장된 신화인가?
먼저 한 가지를 분명히 해두죠. 리플레이 공격은 겉보기에 무섭지 않습니다. 비밀번호를 날려버리지도 않고, 초록색 해커 텍스트가 사방에 흩날리는 악성 코드를 주입하지도 않습니다. 그저 교묘하게 이루어질 뿐입니다.

WordPress 페이지를 손상 없이 복제하는 방법
솔직히 말해봅시다. 때로는 새 페이지를 만들고 싶지 않을 때가 있죠. 그냥 기존 페이지를 약간만 다르게 하고 싶을 때가 있어요. 레이아웃도, 블록도, 설정도 그대로요. 왜냐하면...

반려동물 관련 워드프레스 테마 5가지 비교
서론 반려동물 관련 워드프레스 테마를 선택하는 것은 단순한 디자인 결정 이상의 의미를 지닙니다. 사용성, 확장성, 그리고 장기적인 비즈니스 성장에 직접적인 영향을 미치기 때문입니다. 반려동물 관리 및 관련...

수영복 온라인 쇼핑몰 테마 5가지 비교
서론 수영복이나 란제리 독립 매장에 적합한 테마를 선택하는 것은 단순히 시각적인 결정에 그치는 것이 아니라, 전환율, 확장성, 그리고 장기적인 성공에 직접적인 영향을 미칩니다.

워드프레스에서 댓글 기능을 끄는 방법 (정신줄 놓지 않고)
워드프레스 댓글에 대해 이야기해 봅시다. 이론적으로 댓글은 훌륭합니다. 토론을 장려하고, 커뮤니티를 형성하며, 웹사이트에 생동감을 불어넣습니다. 하지만 현실은 어떨까요? 댓글은 종종 문제를 야기하기도 합니다...

워드프레스 500 오류: 웹사이트가 갑자기 오류를 일으킬 때
방금 전까지만 해도 워드프레스 사이트는 아무 문제 없었는데, 페이지를 새로고침하자마자 갑자기 💥 500 내부 서버 오류가 발생했습니다. 아무런 설명도, 사과도 없이 그저 차갑고 혼란스러운 메시지만 남았습니다.

과학 중심 브랜드를 위한 확장 가능한 워드프레스 웹사이트 구축: 아미노USA 프로젝트
서론 오늘날의 디지털 환경에서 웹사이트는 단순히 제품을 나열하는 공간 이상의 의미를 지닙니다. 규제 산업이나 연구 중심 산업에서 활동하는 과학 기반 브랜드에게 웹사이트는 더욱 중요한 역할을 합니다.

글로벌 블레이드 브랜드를 위한 확장 가능한 쇼피파이 스토어 구축: 쿨카타나 프로젝트
서론: 국경을 넘나드는 전자상거래에서 Shopify 웹사이트는 단순한 매장 이상의 의미를 지닙니다. 특정 문화권에서 사업을 운영하는 브랜드의 경우, 웹사이트는 단순한 판매 공간을 넘어 훨씬 더 많은 기능을 수행해야 합니다.
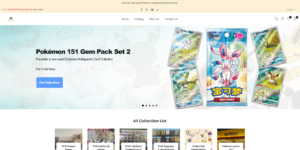
포켓몬 카드 판매를 위한 높은 전환율을 자랑하는 쇼피파이 스토어 디자인하기
서론 수집품 전자상거래, 특히 포켓몬 트레이딩 카드 게임(TCG) 시장에서 웹사이트는 단순히 제품 목록을 나열하는 것 이상의 역할을 해야 합니다.
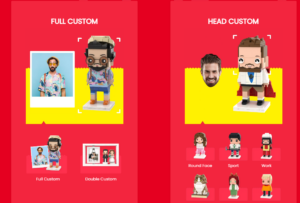
맞춤형 오프라인 브랜드에 최적화된 전환율 높은 쇼피파이 디자인
서론 오늘날 경쟁이 치열한 전자상거래 환경, 특히 맞춤형 선물 및 수집품 분야에서 Shopify 웹사이트는 단순히 제품을 전시하는 것 이상의 역할을 해야 합니다. ...

Shopify 고객 지원팀에 문의하는 방법: 간단하고 스트레스 없는 가이드
쇼피파이 스토어 운영은 흥미진진해야지 혼란스러워서는 안 됩니다. 궁금한 점이 생기거나 문제가 발생하여 진행이 늦어질 때, 쇼피파이는 상황에 따라 다양한 지원 경로를 제공합니다.
쇼피파이 스토어 비활성화 방법: 명확하고 실용적인 가이드
쇼피파이 스토어를 비활성화하는 것은 복잡하지 않지만, 많은 판매자가 간과하는 몇 가지 결과가 따릅니다. 이 가이드에서는 비활성화 과정을 간단하고 유익하게 설명합니다.